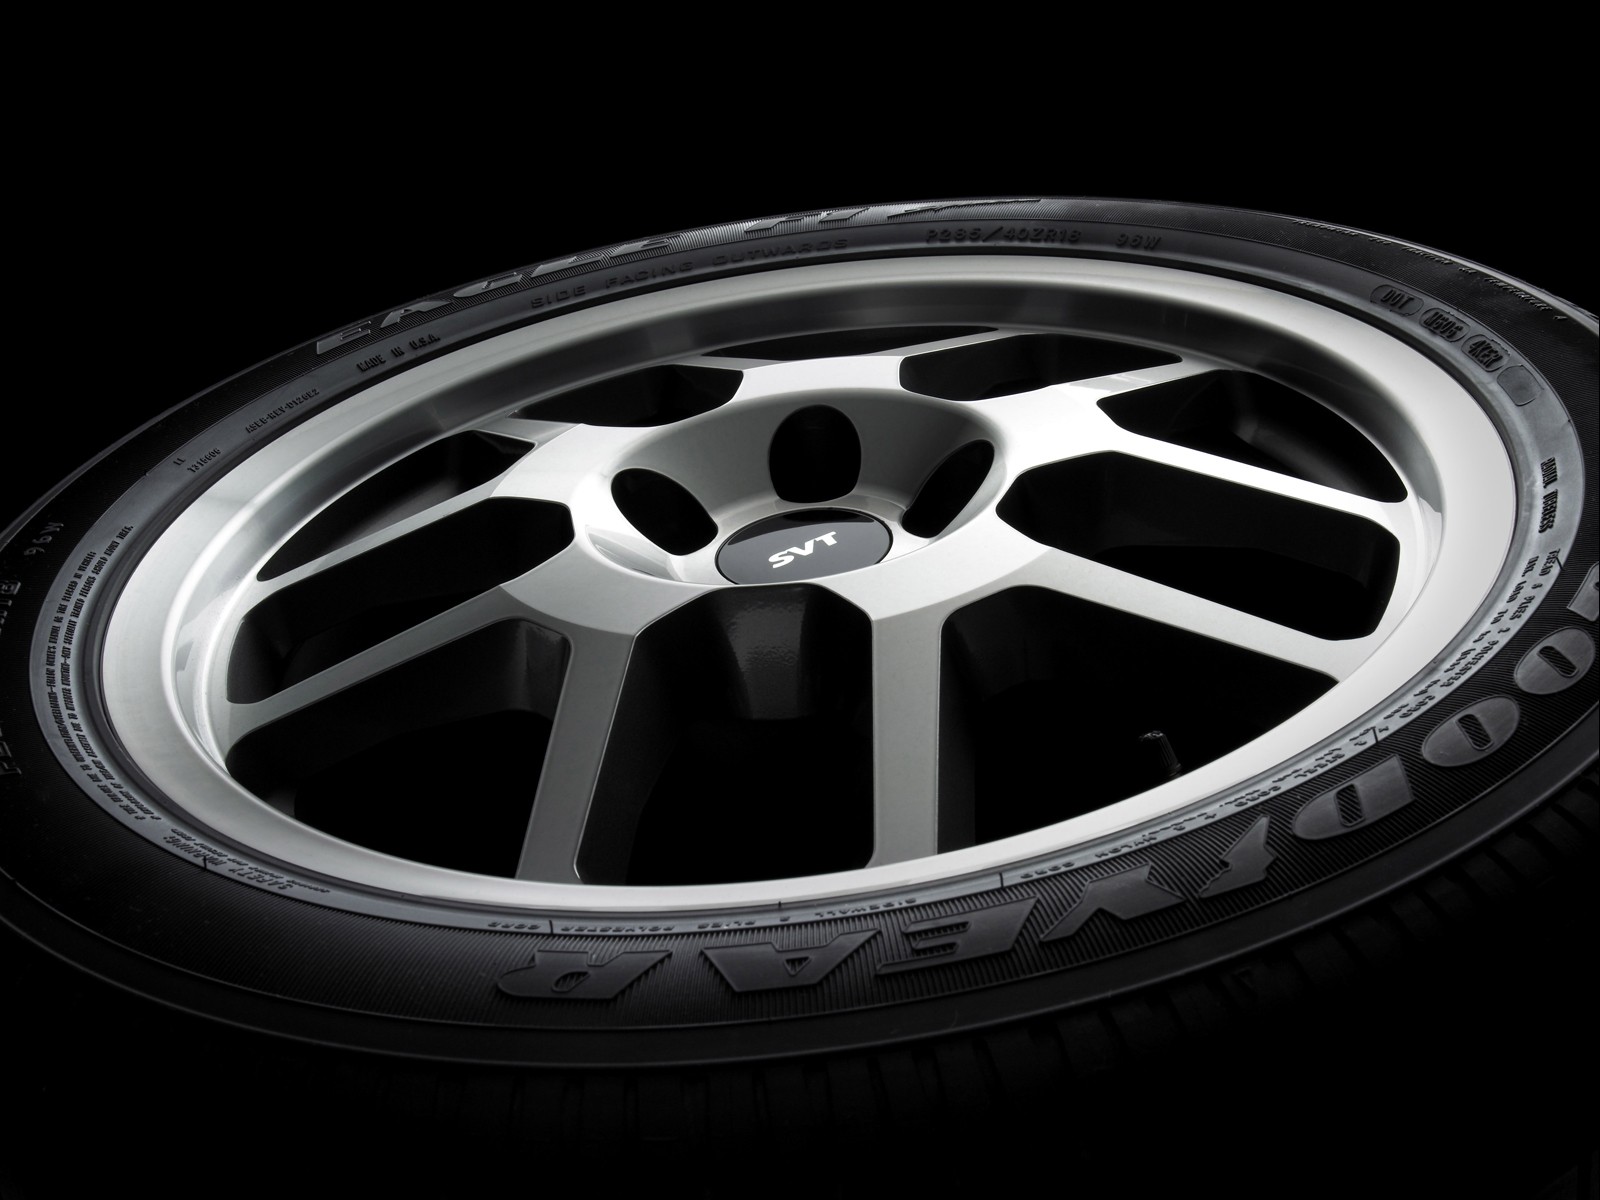
I was browsing Dieselstation.com the other day to look for some reference photo's of silver cars (I am working on a project for a car manufacturer at the moment), when I came upon the following photo of a wheel of a Shelby Mustang GT500, the 2005 GT500 that is, not the '67 one. I liked this photo a lot, thought it was beautiful and thus a couple of days later decided to model it for myself. I didn't start out with the idea of making an exact copy, but more my own interpretation of it: it would obviously look a lot like it, but I didn't intend it to be exactly the same. So in the end my wheel and tyre don't look like the one on the photo lighting and texture wise (my rims are more metal-like, whereas the one on the photo is more silver paint-like), but it's still a nice picture I think.
What follows is a sort of step by step description of what I have done, without going into all the details of the texturing and lighting bit, because it would become too much if I did that. And besides: I don't like describing every single setting in a material. There's no point to it, especially since this is not specifically about making a silver paint texture for instance.
All the screenshots tend to be rather large at full-size, but that's because I work at a 1650x1080 screen.

Modeling
I started out with making some reference splines: first a 10 pointed star...

... then some additional circles for each fase of the rim: the center bolts, the center cap, the center part which goes inwards and the flat bit outside of that.

Then I drew some reference lines for the 'forks'; they're not rally accurate, but I already knew I wouldn't be making an exact copy of the reference photo anyway.


The real modeling bit started here: I created a cilinder which had the exact size of the entire center bit, gave it an additional segment and deleted all the thickness out of it, so that all I had was what you see in the screenshot. Just a flat bunch of polygons shaped as a piece of pie.

Added a couple of Symmetry modifiers, a technique explained in an earlier tutorial: Polygon Modeling 8. Car Rims.

Made a tube, which had the same slice as the first part I created, and that will be the outer part of the rim.

Added a couple of Connects in the edge sub-object. And extruded some more to make a start of the 'fork'.

Connected the center part to the outer part, with the fork.

More refinements to the single part using Connect; the screenshot shows it with all the symmetry modifiers on. This whole bit is still completely flat, so I still need to edit it in the third (the depth) dimension.

And that I started doing here. It's all by feeling: I didn't really measure anything, or actually tried to make it look like the original, it's just a rough equivalent.

So some extruding of edges and moving of vertices later...


... and with all symmetry modifiers.

I liked the shape so far, and thus I started chamfering all the edges that needed to be sharp after they had a MeshSmooth modifier applied to it.

Click image for full-size. 
Applied the MeshSmooth modifier. This is starting to look the way it should, I think!

Click image for full-size.
Created a tube that will function as a base for the tyre.

Added all the text (always Text with a Bevel modifier and then a Bend modifier too) on the wheel. Since one would see it in so much detail, I didn't want to use a bitmap, but actually model everything.


Here's the tyre base with all the text on it and the 'GoodYear' and 'Eagle F1' texts (which I made in Illustrator and imported).

Now with everything unhidden and a camera angle that matches the photo reference better.

Close-up of the wheel with added thread.

Lighting, texturing and rendering
So now that all the modeling is done (I always model everything first, then start lighting and texturing), we can start rendering. Just for giggles sake, I made a clay test render. I use Brazil R/S for almost everything I do, so in this case I had access to the Render Pass Control, and selected Off-White Plaster (80% grey) to be able to spot any modeling errors and general surface properties.

Looks pretty good, but obviously it has a lot of flaws:
- The 'E' of GoodYear has some double faces (that causes this type of rendering artifacts)
- The Eagle F1 and GoodYear don't bend with the base of the tyre, they bend along with the shape, but not with the 'bulginess'.
- The Eagle F1 and GoodYear are too small, they should be stretced.
- There are no rubber pointy, cilinder thingies, the ones that are always on brand new tyres.
- Some of the texts are too 'high'.
- No valve to add air.
All these things were fixed (but I somehow screwed up the camera angle on this one, no idea why):

A couple of Rubber tests: first one was a tyre material I had...

...second one was a test with more reflectiveness....

...third one with some additional lights...

...and a combination of two and three...

..and how it would look on the text and on the thread.

Test of the materials for the valve.

First test of the rim material and a center Shelby logo.

Second test of the rim material, different center Shelby logo, with bump map, and more contrast in the metal, different inner black paint material.

It took me a while to realize that I had made the 5 holes for the nuts in the wrong spot. So I rotated them 36 degrees into place. Also again a different black paint material for the inner bits.

And with everything unhidden. The metal is too flaky, the outer rim has some weird (and I mean very weird) UVW mapping. Too little contrast in the rubber too.

I want more contrast in the image, as in the reference photo. And thus I added a lot more light, both illumination wise as reflection wise.
 See this setup, with two reflection cards.

Click image for full-size.
Test render of this setup for the rubber alone. I wanted more contrast from the front of the image to the back, and this result is already a lot more like it.

And with everything unhidden.

More tweaking.

Added some more detail on the tyre (the ovals at the right top) and made all the text more smooth.

After editting the last render in PhotoShop:

 Subscribe


 The Bamboo Ecobook computer is lined with cardboard and made from recyclable plastic. No sprays or paints have been used on the laptop, and there is no electroplating on any of its components. The laptop offers easy upgrading of parts and replacements under guarantee. It features all the modernity of a normal laptop with the added bonus of being environmentally friendly at the same time. Asus also offer an eco-friendly desktop.


